 MC Build Tools
Minecraft Pixel Art Generator
Upload a photo, logo, or drawing and turn it into a buildable Minecraft block design. Choose a Java or Bedrock palette, edit the result, count the materials, and export a reference image or build file.
Free · no sign-up · your image stays on your device
Updated October 11, 2026
Crop ImageOptional
Drag a corner to resize, or drag inside the box to move it.
Upload an image to crop it.
Size (blocks)
Locked to your image's aspect ratio. Unlock to set width and height independently — this will stretch the build to fit.
64 × — blocks
Color Adjustments & DitheringOptional
Adjustments
Search for a Block
This is what the pencil and fill tools paint with. Type a block name to use it, use the eyedropper to pick a color from your image, or use the eraser to make blocks transparent.
No blocks match """".
Upload an image to see your Minecraft pixel art build here.
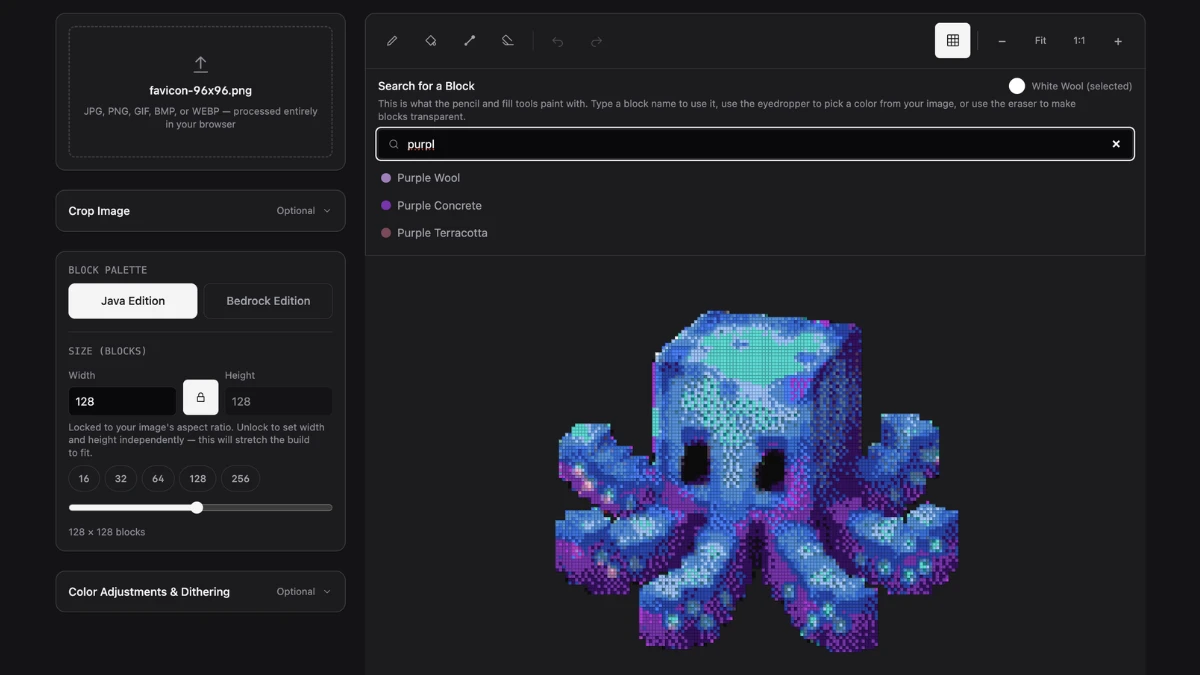
Preview colors are simplified.
The preview uses representative block colors for performance and clarity. Exported build files contain the selected Minecraft block IDs, so you will see the real block textures, transparency, lighting, and resource-pack appearance when you export the build and import it into Minecraft.
Replace BlocksOptional
Swap every block of one type for another across the whole build at once.
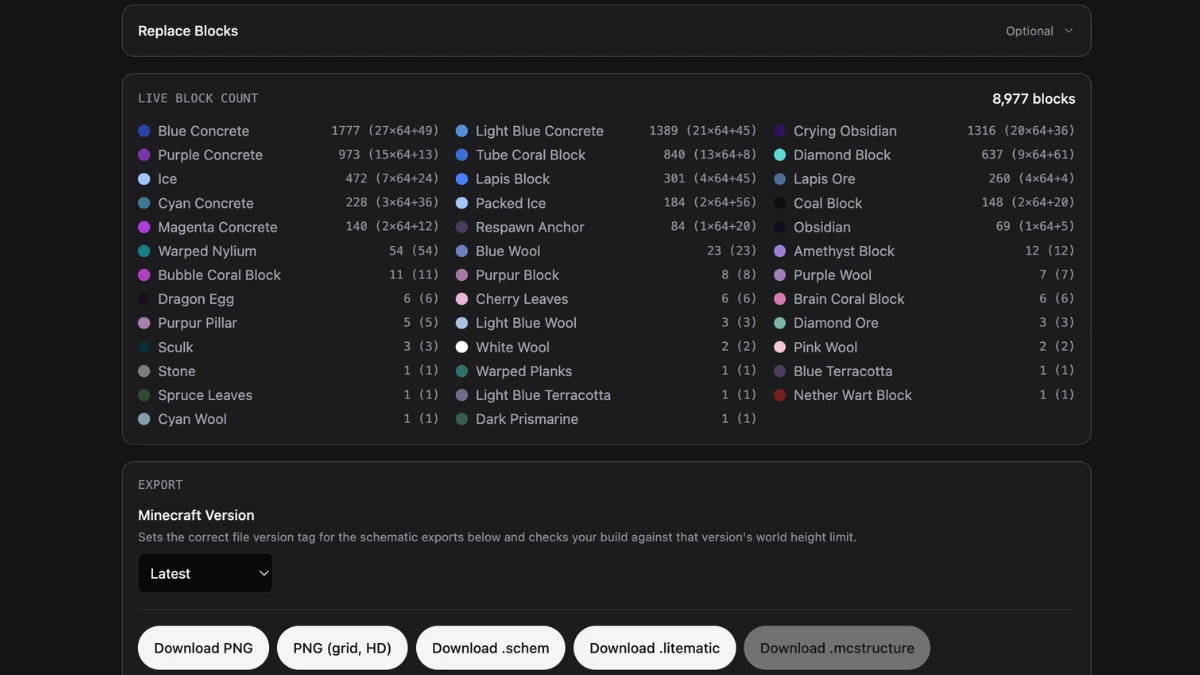
Live Block Count
0 blocks
Export
Sets the correct file version tag for the schematic exports below and checks your build against that version's world height limit.
This sets the Java file version. It does not replace blocks unavailable in older releases.
How to Turn an Image Into Minecraft Pixel Art
Each square in the finished design represents one block in your world. Start with the smallest size that keeps the subject recognizable; a larger grid preserves more detail, but it also takes more blocks and more time to build.
- 1
Upload and crop your image
Choose a JPG, PNG, GIF, BMP, or WEBP file. Crop away empty background or details you do not plan to build.
- 2
Select Java or Bedrock Edition
Use the palette for the edition where you will build so the block names and export options match your world.
- 3
Set a practical build size
Choose the width in blocks and keep the aspect ratio locked unless you intentionally want to stretch the design.
- 4
Check the colors and edit
Compare dithering modes, adjust the image, and use the editing tools to fix individual blocks or replace a material everywhere.
- 5
Count materials and export
Use the live block list to gather materials, then download a reference image, shopping list, or edition-compatible build file.
How the Image to Minecraft Pixel Art Converter Works
This is a color-matching tool, not an AI image generator. It scales your source image to the block grid you choose, compares each pixel with the colors in the selected Minecraft palette, and assigns the closest block. The comparison is done in a perceptual color space, which usually gives a more natural match than comparing raw red, green, and blue values.
Dithering can mix nearby block colors to suggest shades that no single block can match. The result is still a real, editable grid of block IDs, so the material count and downloaded files stay in sync with what you see in the preview.
For practical guidance on planning shapes, choosing blocks, and building by hand, see Minecraft Wiki's pixel art tutorial.
What the Preview Can and Cannot Show
The preview uses representative flat block colors, not Minecraft textures or in-game lighting. The finished wall may look different with a resource pack, shadows, or a different block face. If an exact color match matters, test a small section in your world before gathering every material.
Build-file exports create a one-block-thick vertical design. This is different from map art, where block height and water depth can change the shading shown on an in-game map. Use a dedicated map-art workflow if the map itself, rather than a wall or floor build, is your final result.
Choose a Size You Can Actually Build
Build width matters more than source-image resolution. A detailed photo still loses information when it becomes a 32-block-wide mural, while a simple icon can remain clear at that size. Keep the aspect-ratio lock on to avoid squashing the image, or unlock it to set the width and height independently. The tool also warns when a tall design exceeds the world-height limit for the Minecraft version selected at export.
For a solid rectangular mural, the rough material total is width × height. That makes a 32 × 32 design 1,024 blocks, or 16 full stacks. Transparent pixels and erased cells need no block, so check the live total for the exact number.
Settings That Make the Biggest Difference
- Fine-tune brightness, saturation, and contrast
- Use the brightness, saturation, and contrast controls before editing individual blocks. Small adjustments can help the converter find a clearer or more practical block palette.
- Crop before increasing the size
- If the subject occupies only part of the image, crop the empty area first. More of your available blocks will then describe the part you care about.
- Use no dithering for flat artwork
- Logos, sprites, and cartoons usually look cleaner with solid color areas. Start with no dithering, then try Ordered if large gradients look stepped.
- Try Floyd–Steinberg for photos
- It preserves gradual color changes well. Atkinson produces a lighter, less dense pattern and can work better when Floyd–Steinberg looks too noisy.
- Edit expensive or awkward blocks
- Search the block palette and select the material you want to use. Use Replace Blocks to swap one material across the whole blueprint. The pencil, fill, eyedropper, eraser, undo, and redo tools are better for smaller corrections.
Plan Materials With the Live Block Count
The material list updates after every edit and shows both the exact count and the number of 64-item stacks. Download it as CSV for a spreadsheet or TXT for a simple shopping list. This is especially useful in Survival, where replacing a rare block before you start building can save a second gathering trip.
Java and Bedrock Export Options
| Format | Edition | Best for |
|---|---|---|
| PNG or HD grid PNG | Java and Bedrock | A standard reference or a high-resolution reference with grid lines |
| CSV or TXT | Java and Bedrock | Gathering and tracking materials |
.schem | Java | Compatible schematic tools such as WorldEdit |
.litematic | Java | A Litematica placement guide |
.mcstructure | Bedrock | Bedrock structure import workflows |
A build file does not place blocks by itself. You still need the matching mod, plugin, or structure-import workflow, and some servers restrict those tools. Select your Minecraft version before exporting so Java schematic files carry the right version tag.
Your Image Is Processed in Your Browser
Your JPG, PNG, GIF, BMP, or WEBP file is read locally by your browser. It is not uploaded to MC Build Tools, used to train a model, or stored in an account. The conversion and file creation happen on your device. See the Privacy Policy for site-wide details.
Frequently Asked Questions
Is the Minecraft Pixel Art Generator free?
Yes. The generator is free to use and does not require an account or sign-up.
Does my image get uploaded or stored?
No. Your image is processed locally in your browser. It is not uploaded to MC Build Tools, stored in an account, or used to train a model.
Does it work with both Minecraft Java and Bedrock Edition?
Yes. Choose the edition where you plan to build. Java supports .schem and .litematic exports, while Bedrock supports .mcstructure; both editions can export PNG, CSV, and TXT files.
What image formats are supported?
JPG, PNG, GIF, BMP, and WEBP. The generated design is static, so animated images are not exported as animation.
What kinds of images give the best results?
Images with a clear subject, strong outlines, and limited background detail are easiest to recognize at small build sizes. Crop photos tightly, and use a larger block width when faces or fine details matter.
How many Minecraft blocks does one pixel use?
Each pixel in the generated grid represents one Minecraft block. Transparent or erased cells represent empty space and are not included in the live material total.
Can I edit the generated block design?
Yes. Use the pencil, fill, eyedropper, and eraser for individual changes, or replace one block type across the entire design. Undo and redo are available while you edit.
How do I put the finished pixel art into Minecraft?
Build it manually from the grid PNG and block list, or export a compatible file. Java players can use .schem with a schematic tool or .litematic with Litematica. Bedrock players can use .mcstructure with a compatible structure-import workflow. A matching tool is still required to load the file.